This guide shows you how to create a simple WordPress gallery inside your page or post
Step 1
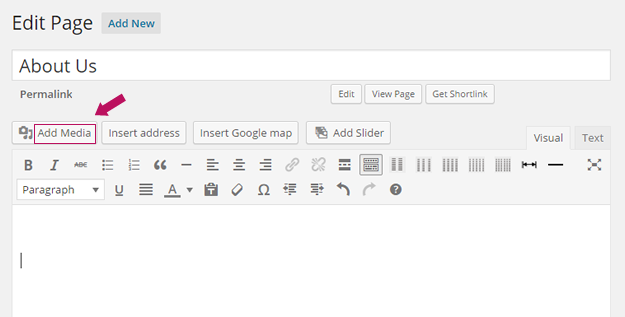
Ensure you are on the “Edit Page” or “Edit Post” screen.
Next make sure the cursor is in position where you would like to insert the gallery into the page. Then select “Add Media”

Step 2
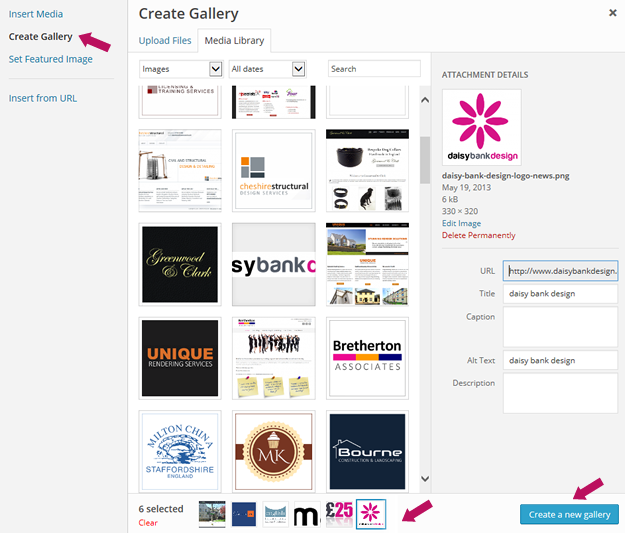
As shown below, select “Create Gallery” on the left side.
Select your images from your area, or upload new ones.
Once you have selected all of your images, they appear in a line at the bottom. Then select “Create new Gallery” in the bottom right corner.

Step 3
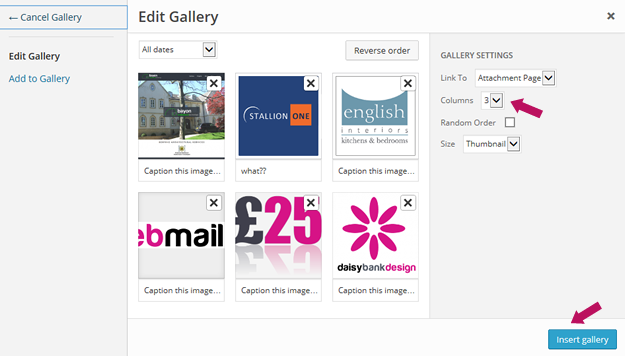
On the next screen. Check you are happy with the images you have selected.
The only settings you need to look for is “Columns”
This will choose how many thumbnails are setup on one line. Select the number you wish and then select “Insert Gallery”
Don’t worry you can always come back and change the number of columns if you are not happy with it the first time.

Step 4
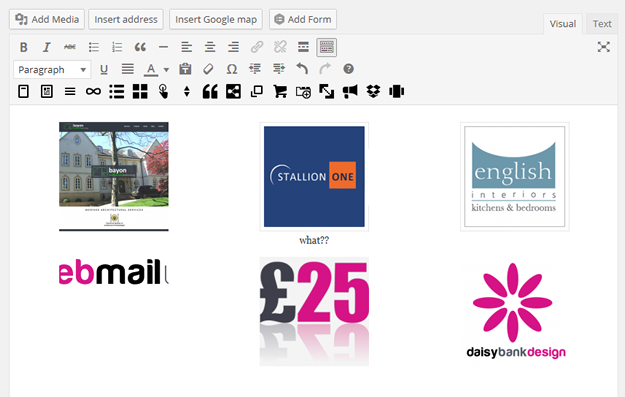
You will then see the gallery on your page. You can then “Publish” or “Update” the page and view your changes on the website.

That’s it! All done.